This lab focuses on configuring and understanding persistence profiles within an F5 BIG-IP environment.
You will gain hands-on experience with various persistence methods, including cookie-based and source IP persistence, to ensure session continuity for backend applications.
By the end of the lab, you will be equipped with the knowledge to implement these techniques effectively, maintaining consistent user sessions and improving application reliability.
Objectives
Apply and view the effect of a Persistence profile
Examine the advantages and drawbacks of both source IP and cookie-based persistence profiles
Implement custom modifications to strengthen the security of persistence profiles
Pre-requisites
Complete the initial lab building tutorial
Download and apply the Persistence configuration file : Persistence_base.ucs
Tasks
Credential list :
F5 Big IP :
Username : admin (web ui) / root (cli)
Password : MyLabs789$
Web Viewer VM :
Username : labs
Password : labs
Web Server VM :
Username : labs
Password : labs
Task 1 : Apply the a source IP persistence profile
After loading the UCS file, you should notice that 2 virtual servers and their associated pools have been created. These virtual servers are configured to load balance HTTP traffic using the round-robin method.
| Virtual Server name | Virtual Server IP:port |
| slimmer_http | 192.168.110.103:80 |
| slimmer_https | 192.168.110.103:443 |
In this first task, we will work with the slimmer_http virtual server.
First, verify that the virtual server is functioning as expected. Open the virtual_viewer VM and navigate to http://192.168.110.103.
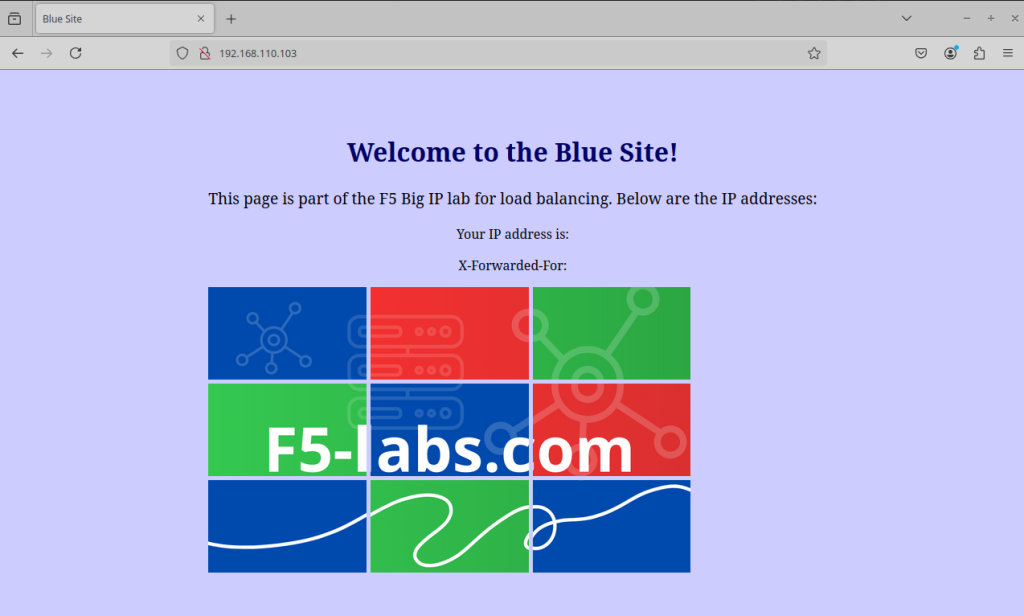
You are pleased that your basic virtual server is functioning as expected. However, the system administrator is now assigning you additional tasks.
His website needs to ensures that a client’s requests are directed to the same backend server for the duration of their session. This is crucial for maintaining session data consistency, such as login states, shopping cart contents, or user-specific preferences. He wants to persist based on client IP source address.
Create and apply the correct profile and verify that you are redirected to the same web server on every new request.
First, create the source IP persistence profile by going on the Local Traffic ›› Profiles : Persistence menu. Select create.
In the new page, put a name for the profile and select Source Address Afinity as persistence type. Let all other option as default.
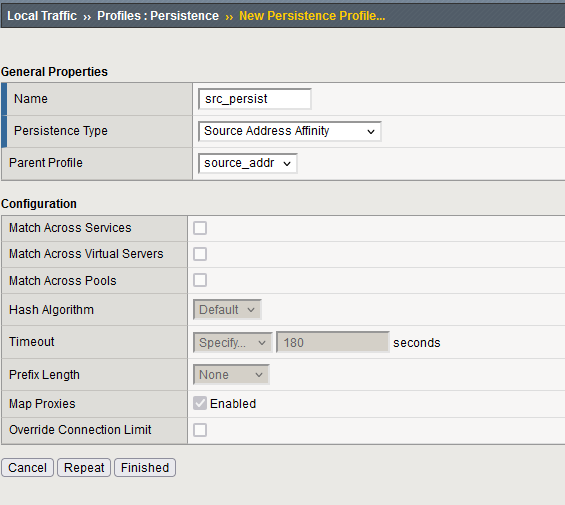
Apply the profile on the slimmer_http virtual server by going in the menu Local Traffic ›› Virtual Servers : Virtual Server List ›› slimmer_http. Select the Ressource Tab.
On this view, apply your previously created profile as Default Persistence Profile.
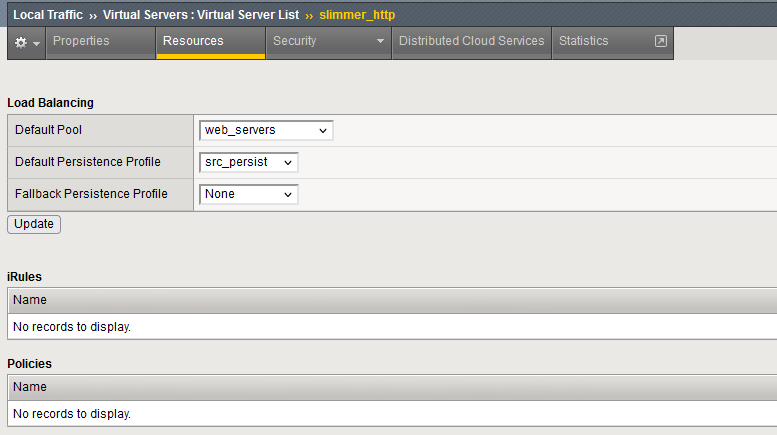
By going on the webviewer VM, every hard refresh should send you to the same web server :
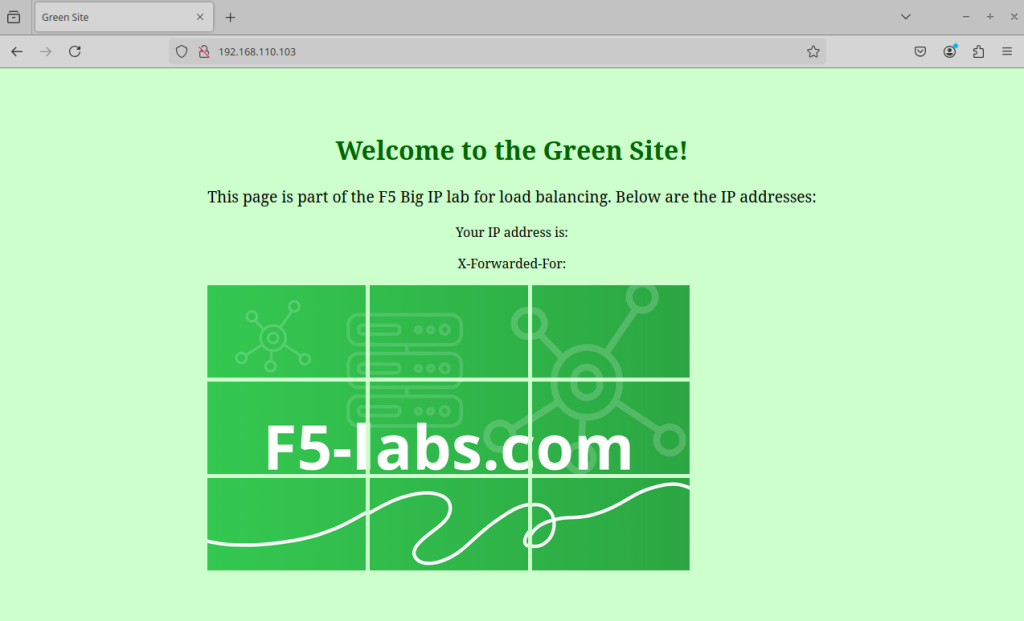
Open the webviewer2 VM. Accessing the slimmer_http virtual server, is the same backend server used ?
It should route to a different backend server. However, each hard refresh directs the traffic to the same backend server as expected (the client is persisted).
The system administrator is pleased with the modification, as users are now consistently directed to the same web server. However, they wonder what would happen if the server a client is persisted to becomes unavailable.
To test this scenario, disable the server accessed by the webviewer VM in the web_servers pool.
Is the client still persisted to the server after it is disabled ?
Yes the persistance is still occuring when a pool member is disabled.
Is the client still persisted to the server after it is forced offline ?
No, the client is no longer persisted to the server when forced offline. A new one is choosed.
Enable all pool members that were desactivated / forced offline.
Your supervisor is pleased that you successfully addressed the system administrator’s requirements. However, he is curious about the potential impact of the new configuration on the performance of the F5 BIG-IP system. Specifically, does it increase memory consumption?
How does the F5 Big IP keep track of source IP persistance ? Use a CLI command to demonstrate the tracking.
The F5 Big IP track the source IP persistance using the persistence table.
You can access the persistance table using the command show ltm persistence persist-records
Since we accessed the virtual server with 2 clients, 2 persistances records are stored :
root@(jowxchdenoef)(cfg-sync Standalone)(LICENSE EXPIRES IN 2 DAYS:Active)(/Common)(tmos)# show ltm persistence persist-records
Sys::Persistent Connections
source-address 192.168.110.2 192.168.110.103:80 192.168.120.3:80 (tmm: 1)
source-address 192.168.110.2 192.168.110.103:80 192.168.120.3:80 (tmm: 0)
Total records returned: 2
The persistance table consume the Big IP memory, virtual server under heavy traffic can lighly affect the memory used.
A large partner accessing your virtual server is using a proxy server, which means all of their users (hundreds) are accessing your virtual server under the same source IP address. As a result, you notice that the load balancing is uneven.
Since session persistence is based on the source IP address, hundreds of users are being directed to the same backend server.
Your supervisor asks you to explore and test alternative persistence methods.
Task 2 : Cookie persistance, a sticky situation
You heard that another good ways to perform persistance is to use cookie.
Remove the source IP affinity persistance profile from the slimmer_http virtual server.
Create a cookie persistance profile. Can you select it as the default persistance profile on the slimmer_http virtual server ? Why ?
Go to Local Traffic ›› Profiles : Persistenceand create a new profile. Enter a name and let all the default value :
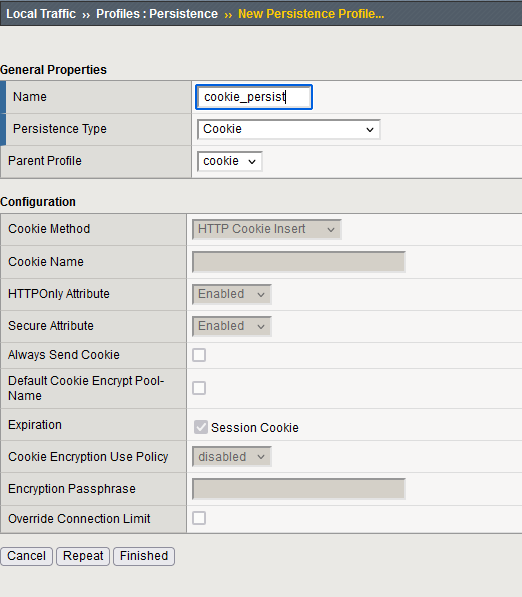
Apply the profile on the slimmer_http virtual server by going in the menu Local Traffic ›› Virtual Servers : Virtual Server List ›› slimmer_http. Select the Ressource Tab.
On this view, apply your cookie persistance profile on the default persistence profile.
The F5 Big IP doesn’t let you apply this profile. To perform manipulation on the HTTP layer (inserting cookie), the virtual server needs a HTTP profile.
Add the default http profile to the slimmer_http virtual server in the properties view :
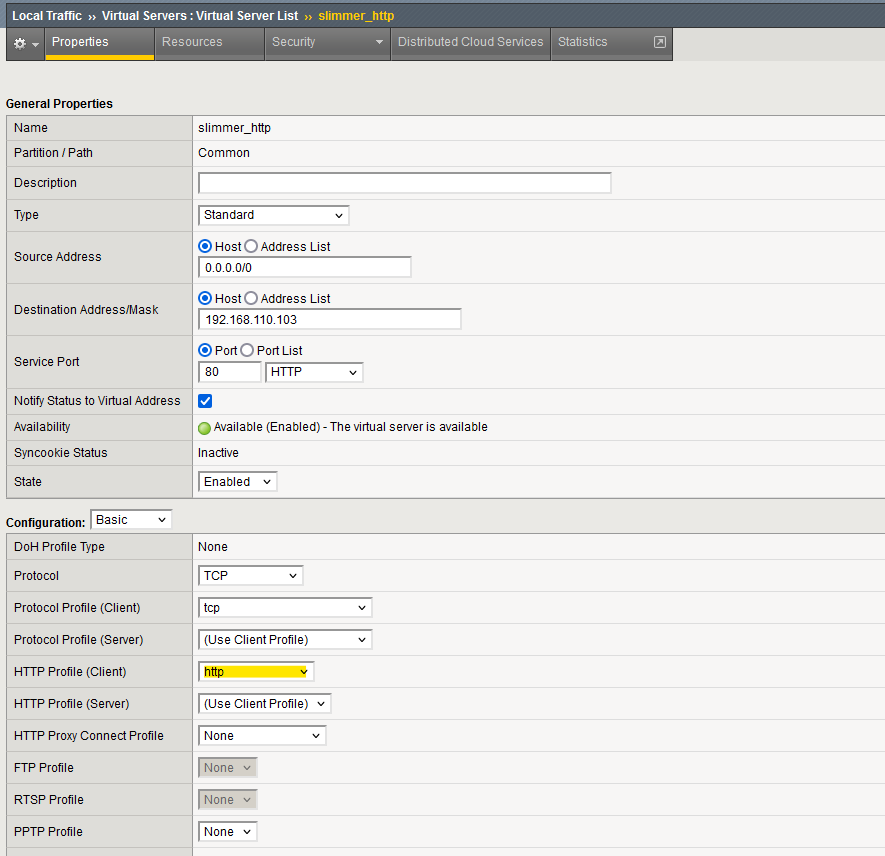
Can you now add the cookie persistance profile ?
Now that the virtual server is “HTTP-aware,” you can replace source IP persistence with cookie persistence.
To perform actions at the HTTP layer, an HTTP profile must be applied to the virtual server.
Since cookies operate at the HTTP layer, the virtual server is now equipped to handle cookie-based persistence.
Access the virtual server using Webviewer1 and Webviewer2. Are they persisted to the same server upon each refresh ?
With each refresh, each client access their designated server. The persistence is functioning as expected.
The system administrator conducts several tests with the developer. The developer, working in a Linux Bash environment, uses multiple curl commands to access the virtual server. However, they report that their session is not being persisted across multiple curl requests.
To investigate, open a terminal in webviewer1 and execute the following command multiple times:
curl -s http://192.168.110.103 | grep Welcome The command returns the content of the web page and displays the name of the backend server that handled the request.
Is the developper saying the truth that using curl, the session is not persisted ? Why ?
Peforming multiple curl, you find out that the page returned is changing at each request :
curl -s http://192.168.110.103 | grep Welcome
<h1>Welcome to the Green site !</h1>
curl -s http://192.168.110.103 | grep Welcome
<h1>Welcome to the Red site !</h1>
This confirms that the developer is correct in saying that persistence is not working with curl.
By default, curl requests are independent, unlike those made by a browser (by default, browser store and resend cookie on subsequent requests). For cookie-based persistence to function properly, curl must store and send the persistent cookie generated by the F5 Big IP with each subsequent request.
Using curl option, you can store and send the cookies upon different request in order to simulate a web browser. Using the option -c to store a cookie to a file, and the option -b to send the cookie from files.
Thus, using this curl command multiple times should always return the same backend server :
curl -s -c cookie_file.txt -b cookie_file.txt http://192.168.110.103 | grep Welcome
<h1>Welcome to the Green site !</h1>
curl -s -c cookie_file.txt -b cookie_file.txt http://192.168.110.103 | grep Welcome
<h1>Welcome to the Green site !</h1>
Your supervisor learns of your success in implementing the cookie persistence and now asks you to compare the memory usage of the cookie persistence profile with that of the source IP address profile.
Display the persistance table. Do you see the records ? Why ?
The persistance table doesn’t show any records :
root@(jowxchdenoef)(cfg-sync Standalone)(Active)(/Common)(tmos)# show ltm persistence persist-records
Sys::Persistent Connections
Total records returned: 0
The F5 BIG-IP no longer maintains the relationship between the client and the backend persistence on its own. Instead, this information is stored in a cookie, which is sent to the client. With each new request, the client returns the cookie, containing the record of the backend server to be used.
You explained to your supervisor that the data previously stored on the BIG-IP is now moved to the cookie. Since this information is now under the control of the client, your supervisor wants to know if the user can decode and alter the cookie data.
Display the content of the persistance cookie. Can you decode the data to know to which server the client is redirected ?
On the webviewer VM, open the web developper tool using F12 key.
Perform a hard refresh of the web page. You are now able to select one of the request.
With one of the request selected, a new menu shows on the right side containing information about the request. You can select the cookie tab to display the cookie name and value :
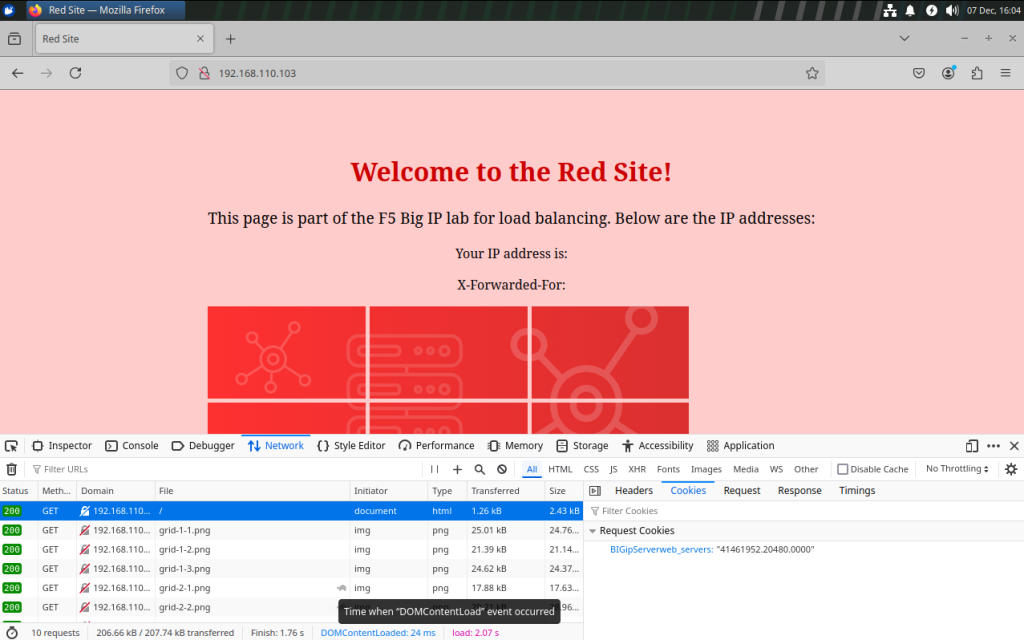
The K6917 explain how to decode the cookie generated by the F5 Big IP.
The user can determine that the configured pool name is “web_servers.”
To identify the actual backend server in use, additional steps are required to decode the value 41461952.20480.0000.
The IP address is encoded in the first part (41461952), while the port is encoded in the middle part (20480).
By using ping, you can easily decode the IP address:

The value 41461952 translates to 2.120.168.192. The final step is to reverse the order of the four integers, resulting in the IP address 192.168.120.2.
Since the IP address is stored in the cookie and the method to decode the value is publicly known, the client can easily retrieve the backend server’s IP address.
Can the client manipulate the cookie to select the backend server ?
Yes the client can manipulate the cookie to select the backend server.
For example, this cookie value select the 192.168.120.4 backend server :
75016384.20480.0000
You can verify, using a curl command that the traffic is always directed to the Blue backend server :

Task 3 : Security above everything
Now that the persistence is functioning and has been pushed to production, the SOC team is knocking at your door.
They’ve heard about the cookie situation and have received a directive to ensure that users cannot obtain the IP address of the backend server or alter the node to which they are load balanced.
What method can be used to ensure user cannot decode and alter the backend server inside the cookie ?
Encryption can be applied to the cookie value, making it unreadable by the user and preventing any alterations.
Implement the encryption of the persistance cookie using the password "MySecurePassword"
Go to your cookie persistance profile ( Local Traffic ›› Profiles : Persistence ).
Enable Cookie Encryption Use Policy and Encryption Passphrase.
You can then Enter the password in the Encryption Passphrase field.
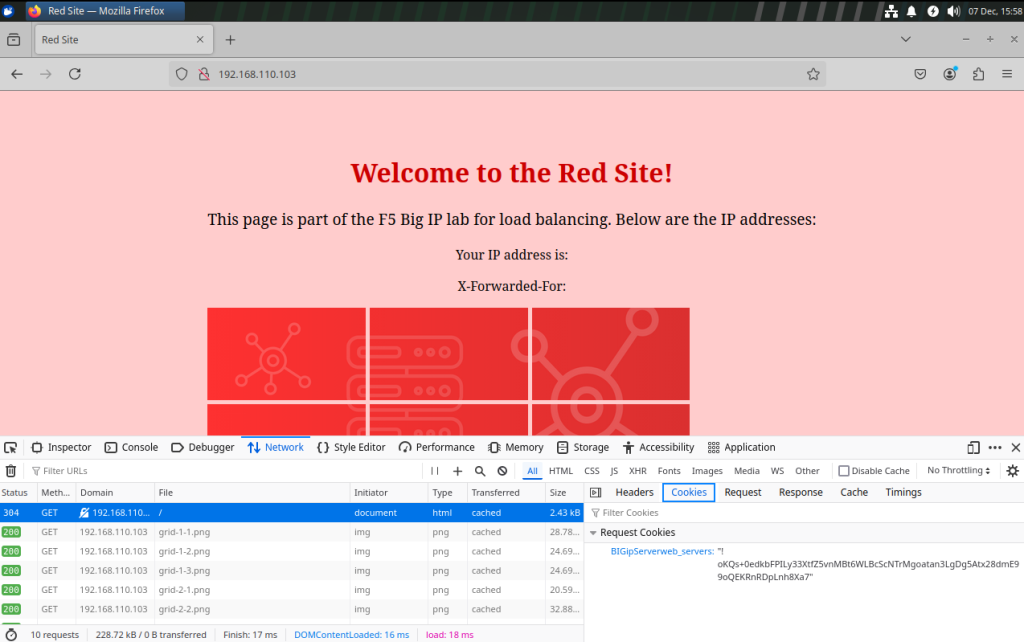
Display the content of the cookie doing a new hard refresh. Is the user able to decode and find the backend server IP address ?
The user is not able to decrypt the value of the cookie and find the backend server IP address now that the cookie is encrypted :
While you were working on enhancing security, the system administrator informed you that they are ready to deliver their application over HTTPS!
He now requests that you modify the slimmer_https virtual server to include cookie persistence as well.
First access and verify that the pre-configured https virtual server is working :
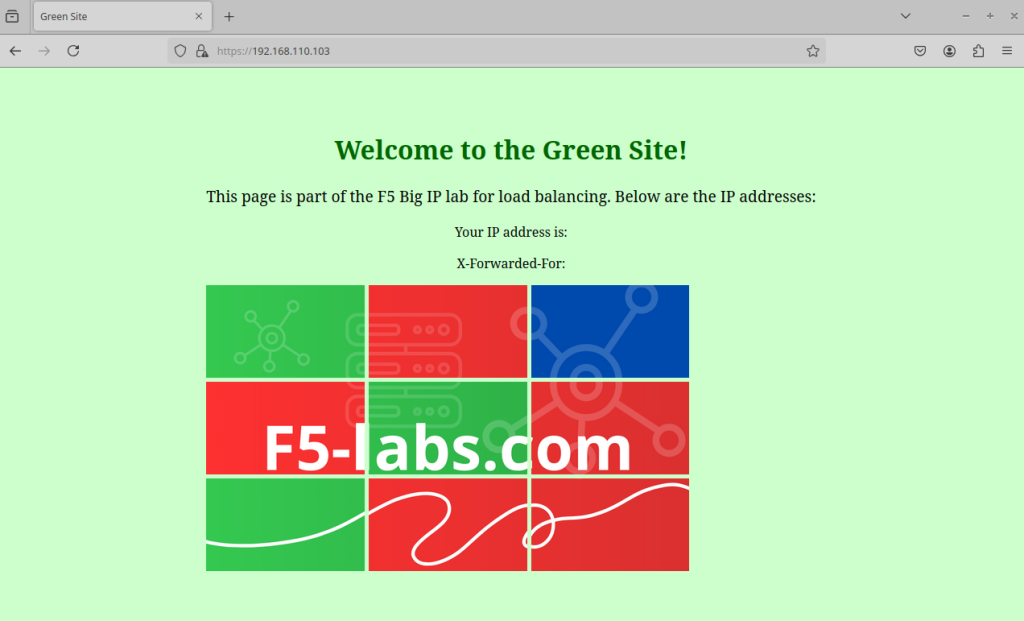
You remember from the first task that in order to enable cookie persistance you need to add a HTTP profile to the virtual server.
Add the default HTTP profile to the virtual server. Try to access the virtual server again.
Can you access the virtual server from the webviewer VM ? Why ?
When the HTTP profile is added to the HTTPS virtual server, access to the site breaks. This happens because, in an HTTPS environment, the F5 BIG-IP device cannot decrypt the encrypted traffic by default. Simply attaching an HTTP profile is insufficient to resolve this issue.
To enable the HTTP profile to function in an HTTPS setup, the F5 BIG-IP must decrypt the encrypted client traffic, process it, and then re-encrypt it before sending it to the backend server. This requires configuring SSL profiles on both the client side and the server side:
- Client-Side SSL Profile: This allows the BIG-IP to decrypt incoming HTTPS traffic from the client.
- Server-Side SSL Profile: This re-encrypts the traffic before forwarding it to the backend server, ensuring secure communication between the BIG-IP and the backend.
With both profiles in place, the BIG-IP can inspect and manipulate HTTP traffic as needed (like inserting the cookie persistence) while maintaining end-to-end encryption.
Add the SSL profile on client and server side. Is the virtual server available again ?
Go to Local Traffic ›› Virtual Servers : Virtual Server List ›› slimmer_https.
Add the default client SSL and server SSL profile :
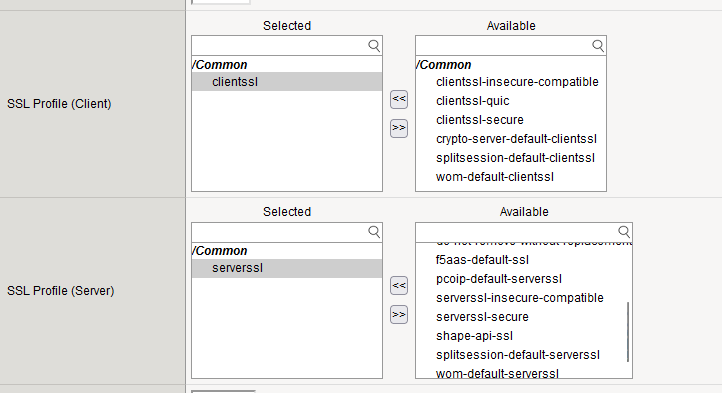
In a production environment, it is essential to use valid SSL certificates issued by a trusted Certificate Authority (CA) to prevent SSL warnings and ensure client trust. However, for the purposes of this lab, you can proceed by accepting the security risks on the client side.
With the necessary adjustments in place, access to the virtual server is now restored.
Add the cookie persistence profile to the virtual server. Are the client persisted to a single server on each refresh ?
Go to Local Traffic ›› Virtual Servers : Virtual Server List ›› slimmer_https.
Add the cookie persistence profile.
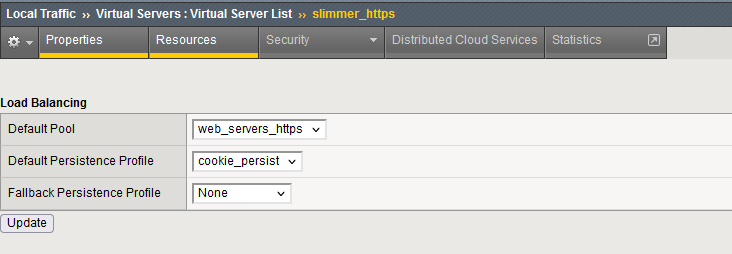
With this modification, the client is now successfully and consistently persisted to the same backend server :

The SOC team has reviewed your configuration and is satisfied with the enhancements. You now have an encrypted cookie mechanism in place and an HTTPS virtual server that successfully maintains client session persistence. From their perspective, everything is secure and functioning as expected.
Conclusion
In conclusion, persistence on F5 BIG-IP offers different methods, each with its own advantages and considerations.
Source IP persistence utilizes the device’s memory to track client sessions, but a major downside is that multiple users behind the same IP address will be directed to the same backend server.
On the other hand, cookie persistence is user-based, ensuring that sessions are directed to the same server even with client sharing the same IP address.
However, cookie persistence requires an HTTP profile and SSL decryption (on HTTPS virtual server). Additionally, to maintain security, it’s crucial to encrypt the cookie value; otherwise, users could decode it and potentially modify the backend server information.
With this in mind, you are now equipped to implement persistence effectively and securely on your F5 BIG-IP system.

You’ve taken a complex idea and distilled it into something both clear and beautiful.